This article provides a step-by-step guide to reconfiguring risk scores based on custom fields, using InScope’s new Simplified Rules feature.
Simplified Rules allow you to easily reconfigure various aspects of your InScope setup. As part of InScope 7.5, we released the Simplified Rules feature for the Jurisdiction risk pillar, as detailed in our previous post. As part of version 7.7, this functionality has also been extended to custom fields as specified below.
One or more risk pillars within your Customer Risk Assessment are based on the values stored within custom fields. A common example is a “Customer” risk pillar that includes rules based on custom fields such as “Is PEP” or “Source of Wealth”. Traditionally, such risk pillars where set up using segments. While segments can still be used, you can now leverage our Simplified Rules feature that allows you to define:
- The custom fields that affect risk scoring against a particular pillar (e.g. Is PEP, Source of Wealth, etc…)
- The values for each option within that custom field (e.g. “Yes” being a 10 and “No” being a 1 for “Is PEP”)
- What risk sources should be considered when assigning such rules – for example, do we consider the values for UBOs or do we extend this to also take into account the values for directors.
Important: The rest of this article assumes that you will be deleting all the rules within a particular risk pillar and replacing them with risk rules generated using the Simplified Rules method. If the new risk scores differ significantly from the old risk scores, the system may generate a high number of Risk Assessments Due warnings. You may opt to only do this on a case-by-case basis or only follow parts of this guide.
Step 1: Disable Automatic Risk Assessments
This step is identical to the one discussed in Part 1.
Usually, if InScope is already configured, making changes to any of the rules will trigger risk assessments and various other warnings for any entity that falls under the related segment, as this is a fundamental change to risk rating criteria and InScope sees this as a trigger event.
In order to avoid this and ensure that automatic risk assessments are not generated while we are re-configuring the rules, we have added a new feature, that allows users to disable InScope’s automatic risk assessment.
Before going any further with this guide, we would recommend that you switch off auto risk assessment to avoid unnecessary warnings and bloated risk assessment statistics.
Step 2: Definition of UBO
This step is identical to the one discussed in Part 1.
When setting up simplified rules, you will be configuring InScope to apply jurisdiction risk based on the jurisdiction risk of UBOs. The system needs to understand what you mean by UBO. In its simplest term a UBO is a shareholder who directly owns shares in the company or owns shares in another company that owns shares in the client company. However, there are two additional considerations1:
- What is the minimum percentage owned that needs to be considered. This minimum UBO percentage value is typically set to 25% but in your risk policy you may want to consider lowering this value so that risks from UBOs with less than 25% are also taken into account.
- In terms of complex structure charts involving trusts and organisations how is the concept of “UBO” inherited. For example, if a client company is owned by a trust which has a settlor, beneficiary, protector and trustee, are all UBOs of the settlor, beneficiary, protector or trustee considered as UBOs of the client company. In most cases, our clients select the option of setting the following as UBOs: Beneficiary (Trust), Beneficiary (Organisation), Settlor, Founder, Controller.
These settings can be configured as follows:
- Open to Settings > Risk Settings. This should display the Definition of UBO widget as shown below.
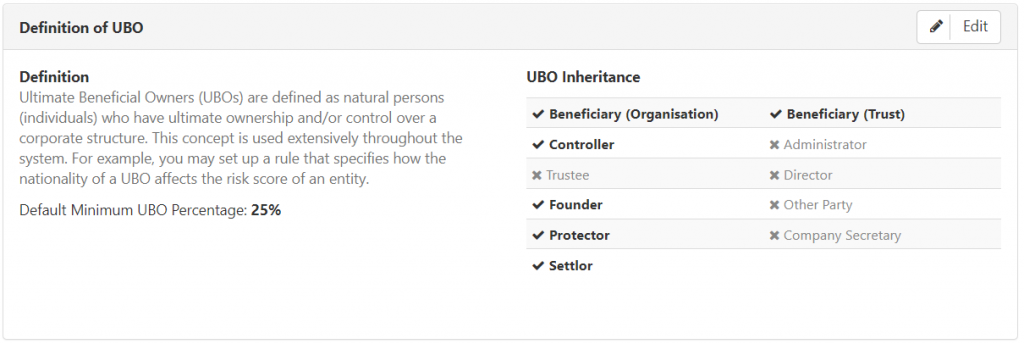
- In order to change any of these settings, you simply need to click ‘Edit’ in the top right corner, which will take you to the following screen:
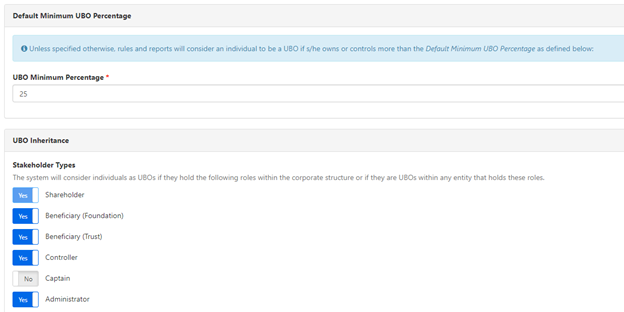
- Should you wish to change the percentage ownership at which a shareholder is considered an Ultimate Beneficial Owner, you simply need to alter the UBO minimum percentage box and hit ‘Save’ at the bottom of the page.
- Similarly, should you wish to change which Stakeholder Types are considered UBOs, simply flip the switch to ‘Yes’ for the Stakeholder to be considered or ‘No’ to discount the relevant Stakeholder; and click ‘Save’.
Step 3: Adding Risk Pillars (optional)
Before going any further you will need to determine if you need to set up more than one risk pillar within InScope. This is useful if you are using an Average Risk Calculation Mode and you would like to have the overall entity risk score based on an average between a number of custom fields. If you associated more than one custom field to the same risk pillar, the overall score of that risk pillar is always calculated as the highest value from all the rules and custom field risk scores within that pillar. To create an additional risk pillar:
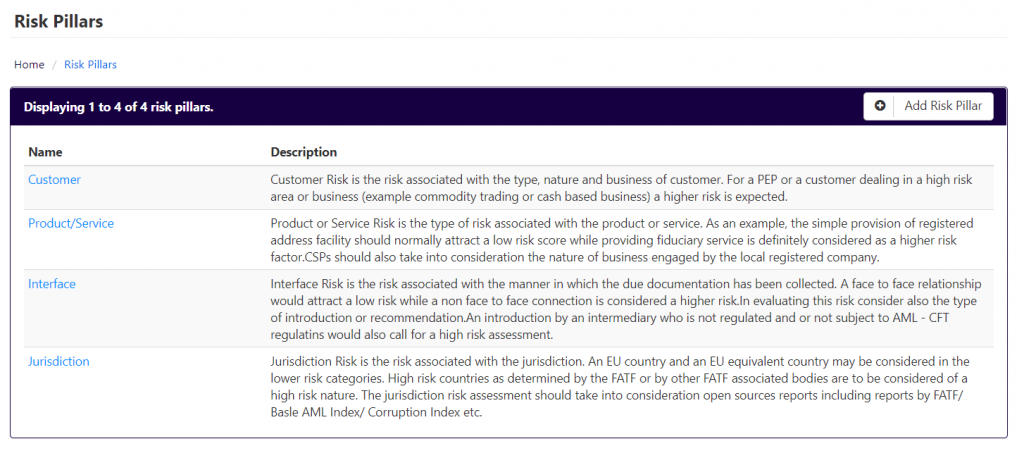
- Go to Settings > Risk Pillar and select Add Risk Pillar.
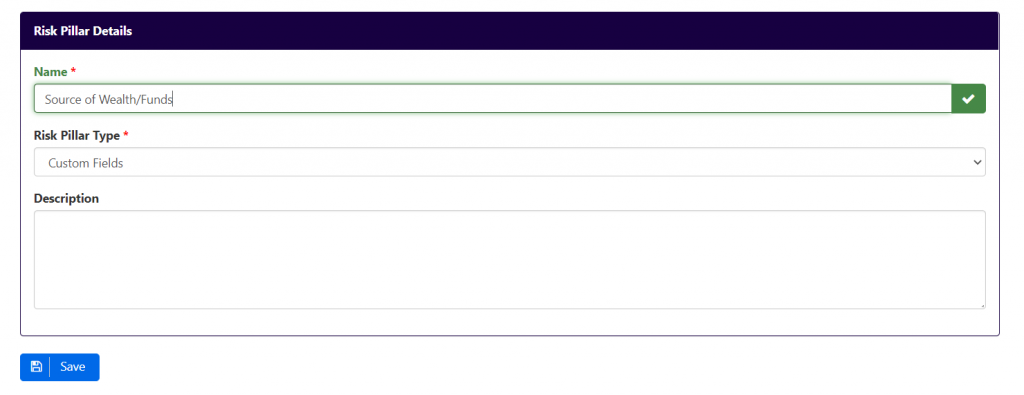
- Enter the name and an optional description for the risk pillar, ensure that the risk pillar type is set to Custom Fields and click Save.
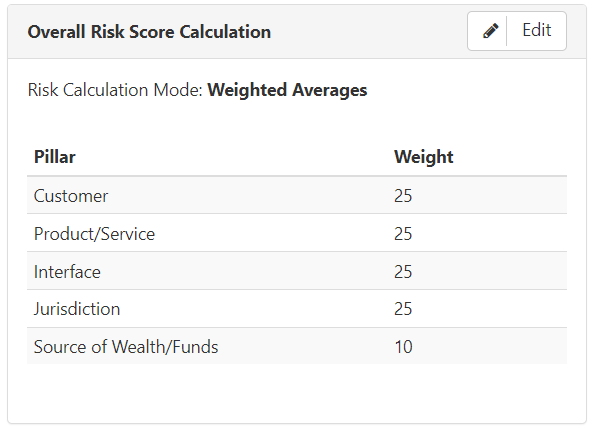
- Go to Settings > Risk Settings and scroll down to the section named Overall Risk Score Calculation. If the Risk Calculation Mode is set to Weighted Averages, select the Edit button.
- Change the risk score calculation weights based on how you would like the new risk pillar to weight in relation to the other pillars.
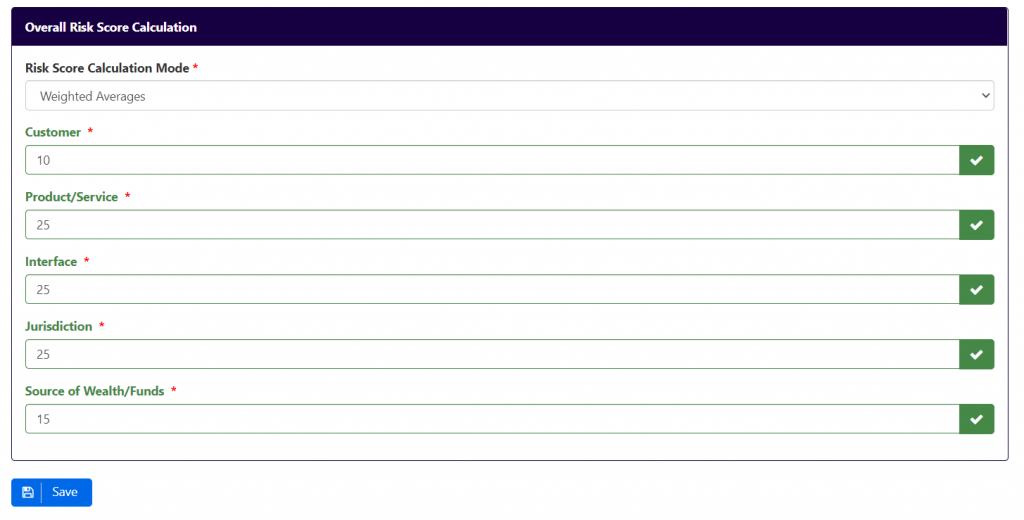
- When done, click Save and repeat the process for any other risk pillars you want to add.
Step 4: Preparing your Risk Pillar Rules
The following steps explain how to configure simplified rules for an existing risk pillar. These steps can obviously be followed for new risk pillars as well and will need to be replicated for all risk pillars required.
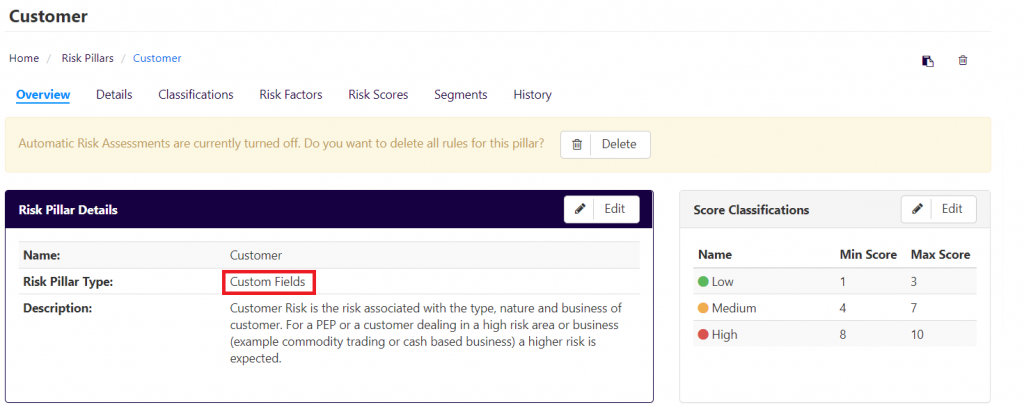
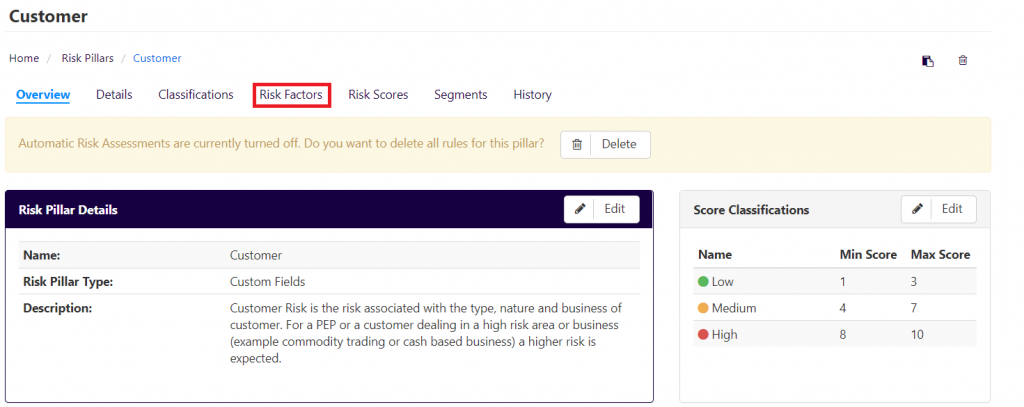
- Go to Settings > Risk Pillars and select the risk pillar you would like to edit.
- Make sure the risk pillar type is set to Custom Fields. If not, click on Edit and change the risk pillar type accordingly.
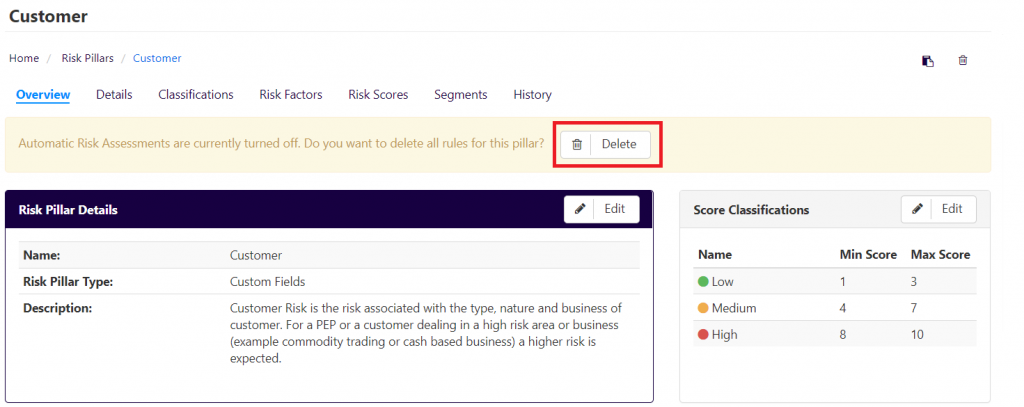
- If you would like to delete all existing risk pillar rules, click on the Delete button and confirm the deletion.
Step 5: Add Risk Factors
- Click on Risk Factors
- Click on Add Custom Field and select the custom field you would like to attach to this risk pillar and click Save:
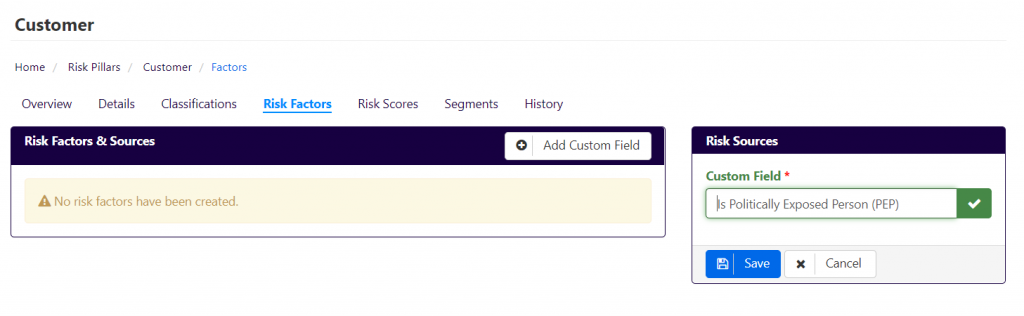
- Repeat these steps for all risk factors
Step 6: Add Risk Sources
- For every risk factor created, select the risk factor from the grid and then tick which entities/entity factors or associations are going to affect the score, as per the below and press Save.

The Risk Sources allows you to define how the custom field value of an entity effects risk ratings along this risk pillar. For example, in this case we have selected “Entity”, “Ultimate Beneficial Owner”. This means that the risk score for a serviced individual is based on the value of the “Is PEP” at the individual level (since we ticked “Entity”). For serviced companies, the risk score is based on the values of its UBOs. There is a small explanation for each, however, please contact support if you have any questions related to Risk Factors.
- After you have done this you should see the risk sources listed next to each risk factor:
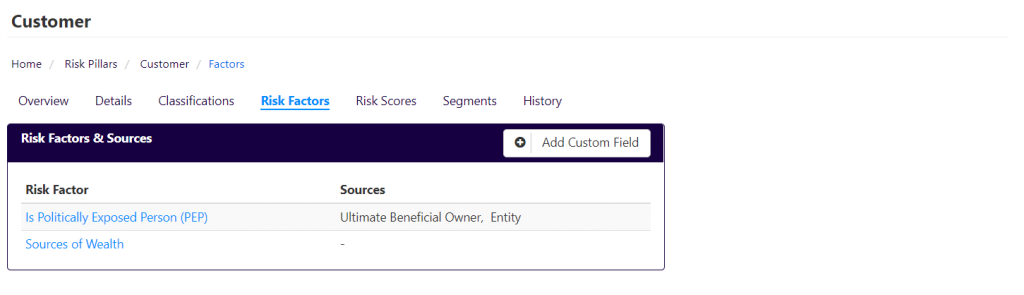
- Repeat these steps for each custom field.
Step 7: Set up Risk Scores
- Click on the name of the custom field or navigate to the custom fields page via Settings > Custom Fields.
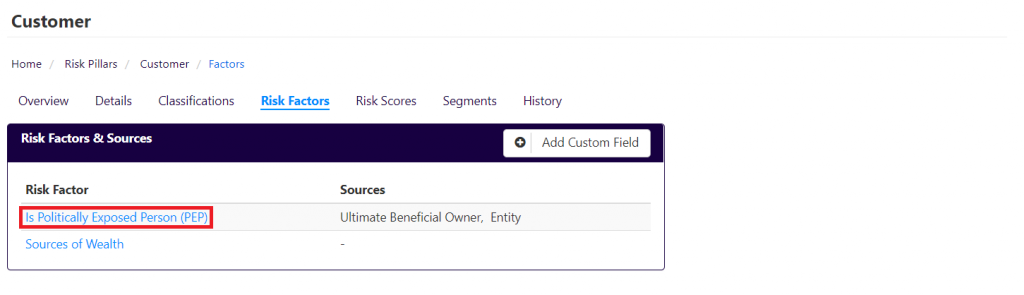
- Click on Edit to edit the custom field.

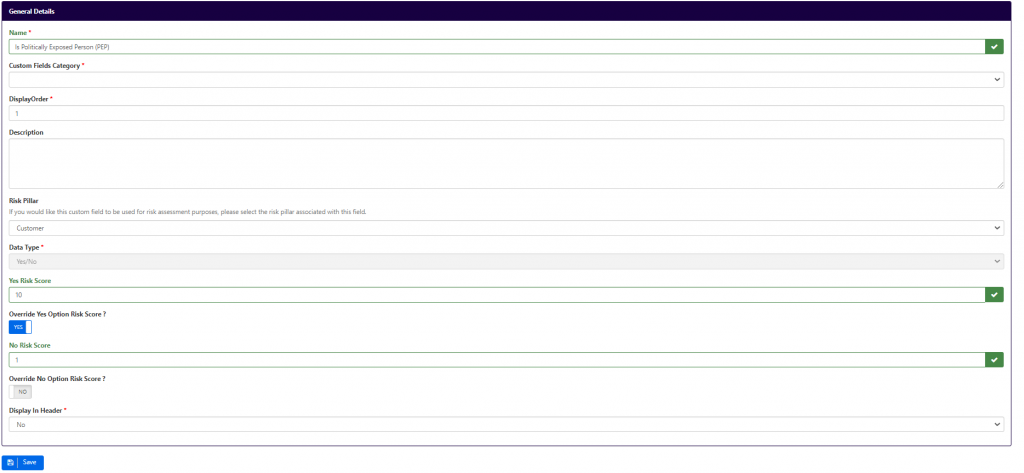
- If the custom field is a Yes/No field, enter the values for Yes/No risk scores in the fields as shown below. Note that you can also tick the option to override the risk score. This is useful in cases where your risk calculation mode is set to average such that the overall entity risk score is calculated based on the average across the risk pillars. If InScope is set up in this manner, and you tick the option to override the risk score average, then the custom fields values would automatically trigger a particular risk classification irrespective of the computed average. In this case, we have selected this option such so that if an entity is a PEP, then the entity is automatically classified as high risk.
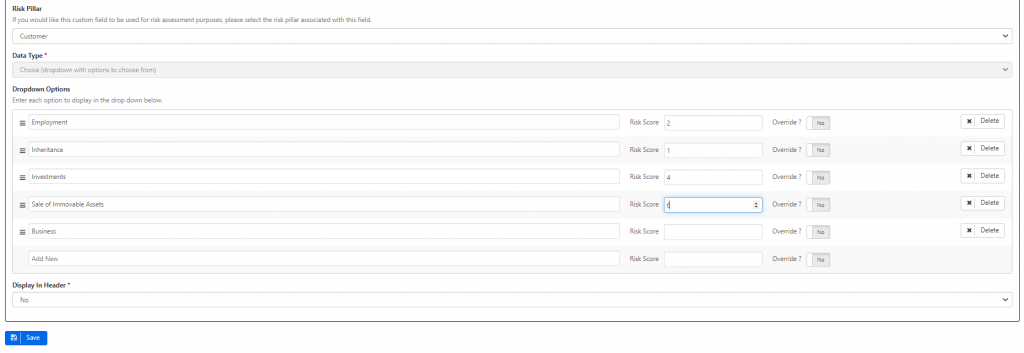
- If the custom field is a choice field, you get the ability to assign a risk score for each option as shown below. This screen also allows you to add additional choice field options:
- Once you are done, click Save and repeat the steps for each custom field.
Step 8: Review Risk Pillar Rules
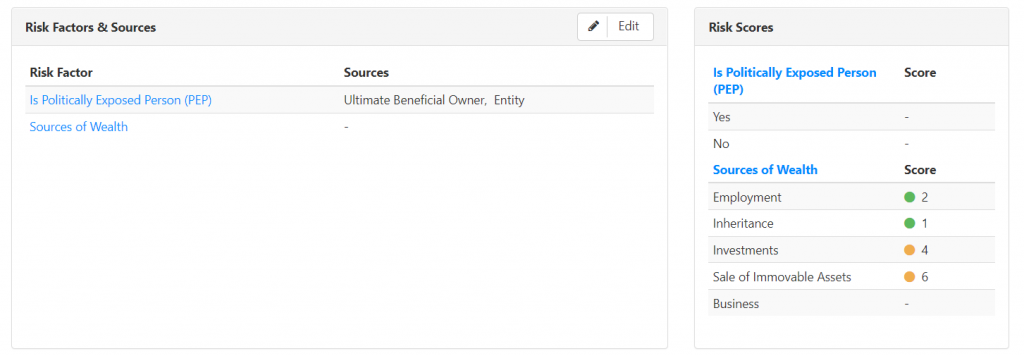
Once you have gone through all these steps, it’s good to review all the rules that are included in a particular risk pillar by going back to Settings > Risk Pillars and selecting the particular risk pillar. The screen should show you a consolidated view of all the risk factors, risk sources and risk scores:
Step 9: Re-enable Simplified Rules
The above steps will generate rules automatically based on the Risk Source and Factors associated. In order to apply these changes across your InScope environment you will need to re-enable automatic risk assessments (from Settings > Risk Settings) as shown above. InScope will then go through all entities to determine if there are any changes in recommended risk scores. If your new jurisdiction risk scores are very different from the risk scores that were set up in InScope, you may generate a number of risk assessment due warnings.