Custom Field Categories are used in the system to group multiple custom fields into a particular section, simplifying the data input process for users.
Step 1
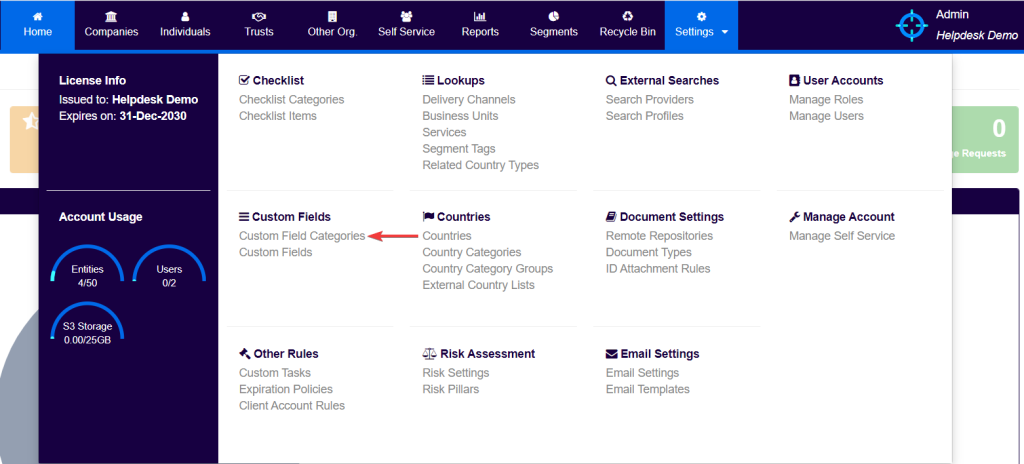
Users first need to click on the Settings tab at the top of the screen.

Next, under the heading Custom Fields, users should click on Custom Field Categories.

Step 2
The system will then present a list of custom field categories which are currently configured, if there are any.
In order to add a new category, users should first click on Add Category on the right-hand side of the screen.

Step 3
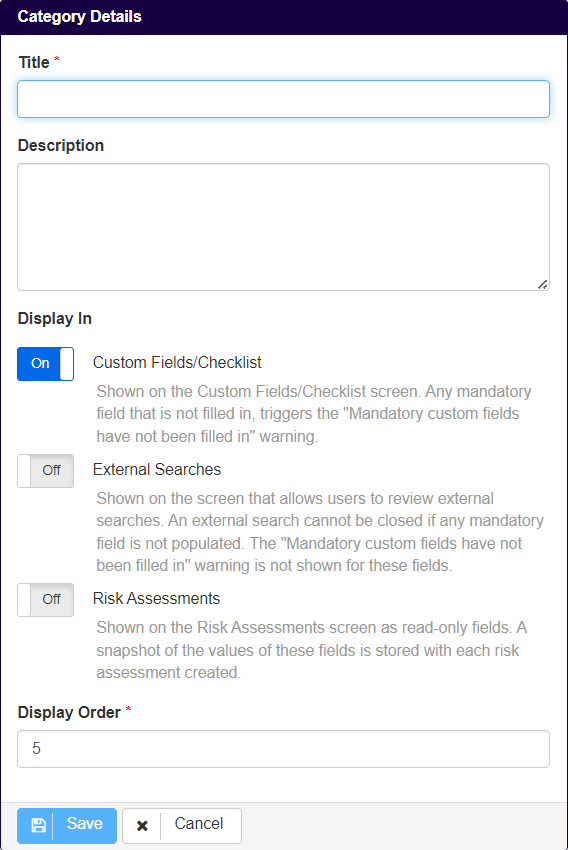
Once the Add Category button is clicked, the system will present the below widget:

Users should then proceed to:
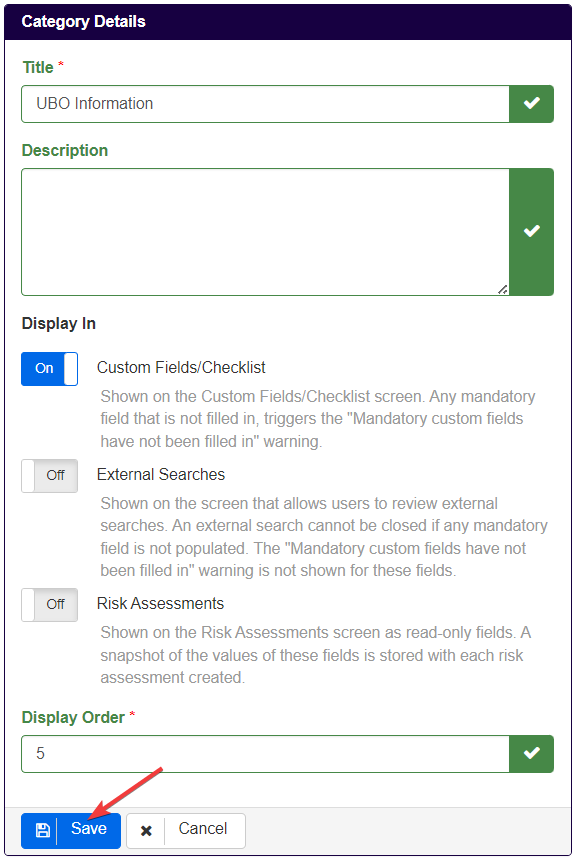
- Input the Title of the custom field category. For example, UBO Information*;
- Optionally, input a brief Description of the custom field category;
- Select whether or not the question should feature in Custom Fields/Checklist, External Searches or Risk Assessments (refer to the below instructions);
- Change the Display Order as desired.**
Finally, click on Save.

For the Display In options users have three choices:
Custom Fields/Checklist
This category will be shown on the Custom Fields/Checklist screen with the custom fields associated with it.
External Searches
This category will be shown on the screen which allows users to review External Searches results. An external search cannot be closed if any mandatory field or mandatory classification, depending on the screening version the user is on, is not populated.
Risk Assessments
This category will be shown on the Risk Assessments screen as read-only fields. A snapshot of the values inputted for the fields within the category is stored with each risk assessment created.
When users create a new custom field to be associated with this group thereafter, this custom field category can be selected from the drop-down menu.

* Fields indicated with a red Asterix (*) are mandatory.
** The display order will let you change the order in which the custom fields would appear on your screen.